Test 3 IT: Creating a Pathfinding Algorithm
1. Context
Mobile robotics today plays a central role in industry, research, and innovation. Robots capable of autonomously moving in complex environments are at the heart of numerous technological challenges, whether in logistics, exploration, assistance, or scientific research. Test 3 fits into this dynamic: it proposes to confront students with a concrete autonomous navigation problem, such as encountered in the professional world.
In this test, the TekBot robot evolves in an unknown environment, simulated in Gazebo, which reproduces the constraints of a real labyrinth. The student must address the question of mobile robotics as an engineer or researcher would: how to enable a machine to perceive, understand, and traverse a space without direct human intervention?
The pedagogical interest of this test is twofold:
- Immerse the student in a realistic situation, close to the problems encountered in robotics research.
- Foster autonomy, rigor, and the ability to mobilize modern tools to solve a complex problem, from understanding the need to experimental validation.
Finally, this test emphasizes the importance of reproducible and documented work: each step, each technical choice must be explainable, justified, and shared, in line with professional practices in robotics.
2. Objectives
The objective of Test 3 is to demonstrate the ability to design and implement autonomous navigation for a mobile robot (here the TekBot robot) in an unknown and constraining environment, such as a simulated labyrinth. The student must enable the robot to reach a defined target position on the map, avoiding all present obstacles, without direct human intervention, drawing on the fundamental principles of mobile robotics: perception, localization, trajectory planning, and autonomous decision-making.
- The TekBot robot must explore an unknown environment and generate a usable map for navigation.
- The robot must be able to autonomously locate itself on this map, even after complex movements.
- The student must enable the robot to reach a target position defined on the map, avoiding all obstacles.
- The solution must work without direct human intervention during the autonomous navigation phase.
- The approach must be reproducible and documented, with each technical choice justified.
The success of the test is measured by the robot's ability to explore, locate, and move reliably and autonomously to the set objective, respecting the environmental constraints. Particular attention will be paid to navigation robustness, produced cartography quality, and provided technical documentation clarity.
3. Workspace Configuration
3.1 Prerequisites
- Operating System: Ubuntu 22.04 LTS (recommended for ROS 2 Humble compatibility)
- ROS 2 Humble installed (official guide)
- Administrator rights (sudo) for necessary package installation
TIP
Ubuntu 22.04 LTS is the reference platform for ROS 2 Humble. It guarantees optimal compatibility with tools, up-to-date documentation, and extended community support.
3.2 TekBot Project Installation
Clone the project repository
git clone https://github.com/charif-tekbot/tekbot_sim.gitThis command downloads the entire source code into a
tekbot_simfolder.Navigate to the project folder
cd tekbot_simMake the configuration script executable (optional if already executable)
chmod +x configure.shLaunch the configuration script
source configure.shThis script:
- Creates the
~/tekbot_wsworkspace - Places the source code in the workspace
- Deletes the unnecessary
binfolder - Sources the ROS 2 Humble environment
- Compiles all packages with
colcon build - Sources the compiled workspace environment
- Creates the
3.3 tekbot_ws Folder Structure
tekbot_ws/
├── build/                      ← Temporary colcon compilation files
│   └── [maze_solving, tekbot, tekbot_description...]
├── install/                    ← ROS 2 package installation result
│   ├── local_setup.bash
│   ├── setup.bash              ← ⚠ to source to activate environment
│   └── lib, share, ...         ← executables, resources of each package
├── log/                        ← Compilation logs
│   └── latest_build/
├── src/
│   └── tekbot_sim/
│       ├── configure.sh
│       ├── README.md
│       ├── maze_solving/
│       │   ├── launch/
│       │   │   └── maze.launch.py
│       │   ├── maps/
│       │   │   ├── maze.yaml
│       │   │   └── maze.pgm
│       │   ├── scripts/
│       │   │   └── generate_maze.py
│       │   ├── maze_solving/
│       │   │   └── _init_.py
│       │   ├── package.xml
│       │   └── setup.py
│       ├── tekbot/
│       │   ├── src/
│       │   │   ├── control_node.cpp
│       │   │   └── main.cpp
│       │   ├── CMakeLists.txt
│       │   └── package.xml
│       └── tekbot_description/
│           ├── urdf/
│           │   └── tekbot.urdf.xacro
│           ├── meshes/
│           │   ├── base_link.dae
│           │   └── wheel.dae
│           ├── launch/
│           │   └── display.launch.py
│           ├── gazebo/
│           │   ├── tekbot.world
│           │   └── model.sdf
│           └── package.xml
4. Tools and Software
4.1 Gazebo Classic
Gazebo Classic is the reference 3D simulator for mobile robotics under ROS 2. It allows testing, validating, and optimizing the TekBot robot's behavior in realistic virtual environments, without material risk. Thanks to its native integration with ROS 2, it facilitates prototyping, software validation, and experimentation with complex scenarios (navigation, SLAM, sensor/environment interactions) before any real deployment.
Why choose Gazebo Classic? Gazebo Classic remains the reference 3D simulator for mobile robotics under ROS 2, especially for the Humble version. It is recognized for its stability, proven compatibility with ROS 2, rich documentation, and community size. Classic is ideal for teaching, research, and projects requiring a robust and well-documented environment. Note: Newer versions (Ignition/Fortress) exist, but Classic is the recommended choice for most ROS 2 Humble projects.
Main Features
- Physical simulation (collisions, gravity, dynamics...)
- Various sensors (LiDAR, IMU, GPS...)
- Creation/import of custom worlds
- Automated and reproducible tests
Available Tools
- Interactive graphical interface (adding/removing objects, scene manipulation)
- Model library (robots, sensors, obstacles...)
- Community plugins and resources
Gazebo Installation
- Run:
sudo apt update && sudo apt install gazebo11 libgazebo11-dev - For ROS2 integration:
sudo apt install ros-humble-gazebo-ros-pkgs ros-humble-gazebo-ros-control
Launch Methods in Gazebo
Several methods are possible to launch the TekBot simulation under Gazebo, depending on the scenario you want to test (robot alone, labyrinth alone, or robot in the labyrinth). Each method allows validating a key development step: installation, environment configuration, or complete autonomous navigation. Choose the method adapted to your need: installation test, environment exploration, or navigation and SLAM validation.
WARNING
Important reminder: Before launching Gazebo or any launch ROS 2 file, make sure you have properly sourced the ROS 2 environment source /opt/ros/humble/setup.bash and sourced the workspace source ~/tekbot_ws/install/setup.bash in each used terminal. Without this, ros2 commands and project packages will not be recognized. For better performance, close heavy applications (browser, IDE, etc.) before launching Gazebo Classic, especially on a laptop.
Basic simulation (robot alone): Launches the TekBot robot in an empty Gazebo environment.
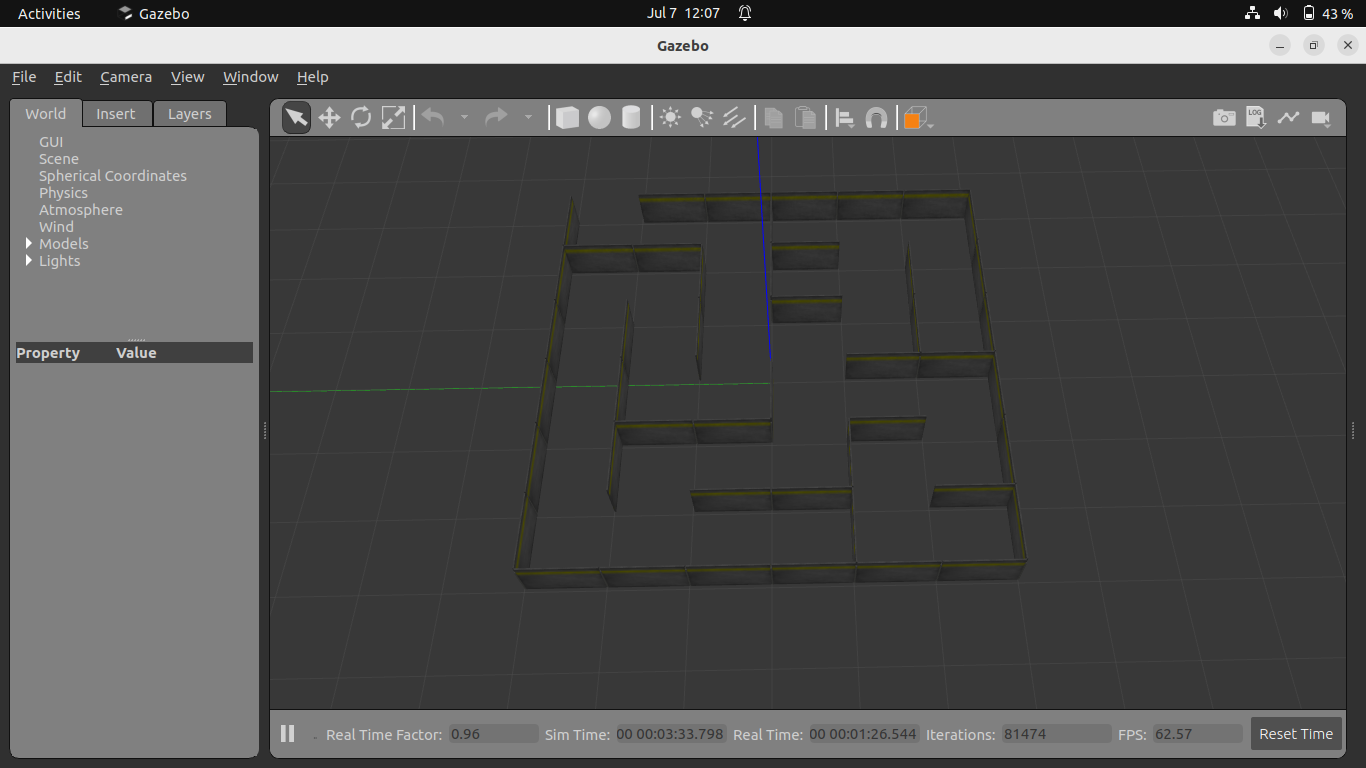
ros2 launch tekbot_description gazebo.launch.pyLabyrinth visualization (without robot): Displays only the maze environment in Gazebo.
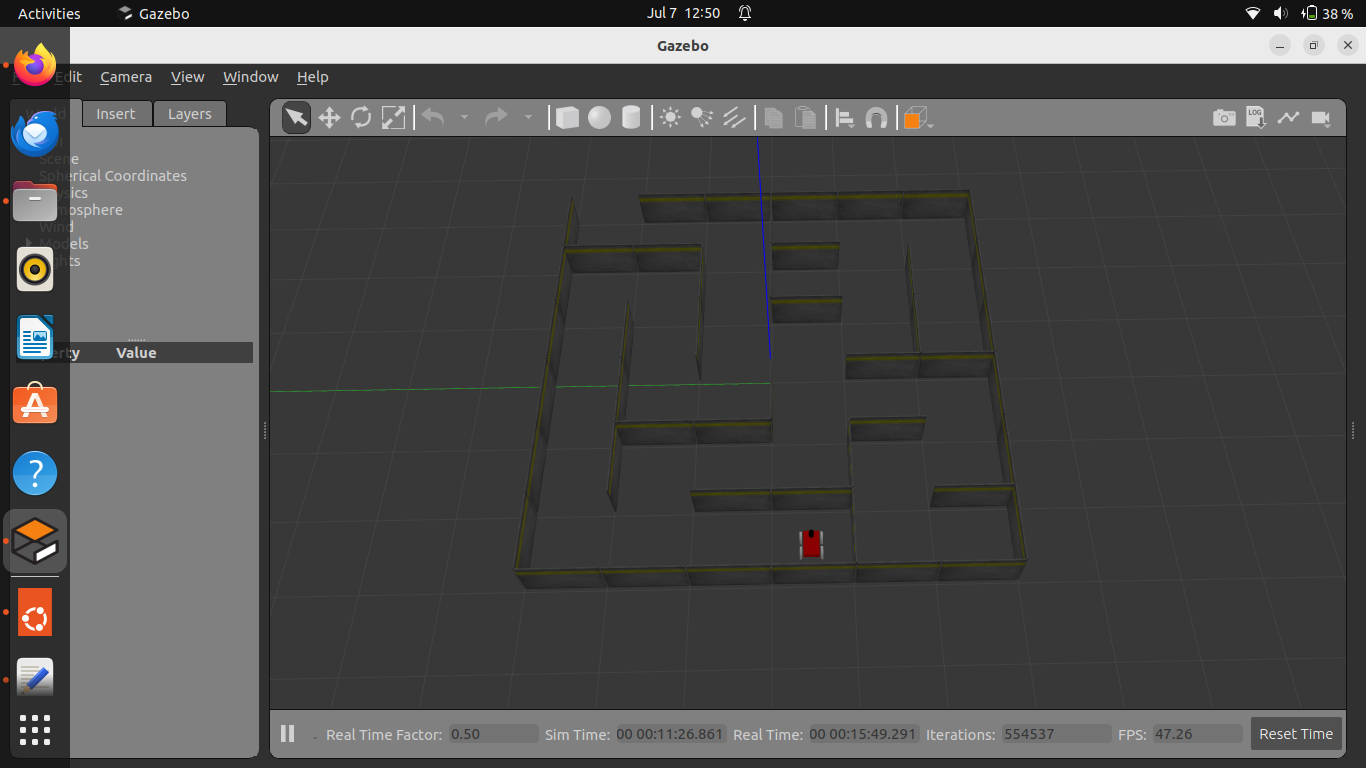
ros2 launch maze_solving maze.launch.pyComplete simulation (robot + labyrinth): Launches TekBot directly in the labyrinth
ros2 launch maze_solving tekbot_maze.launch.py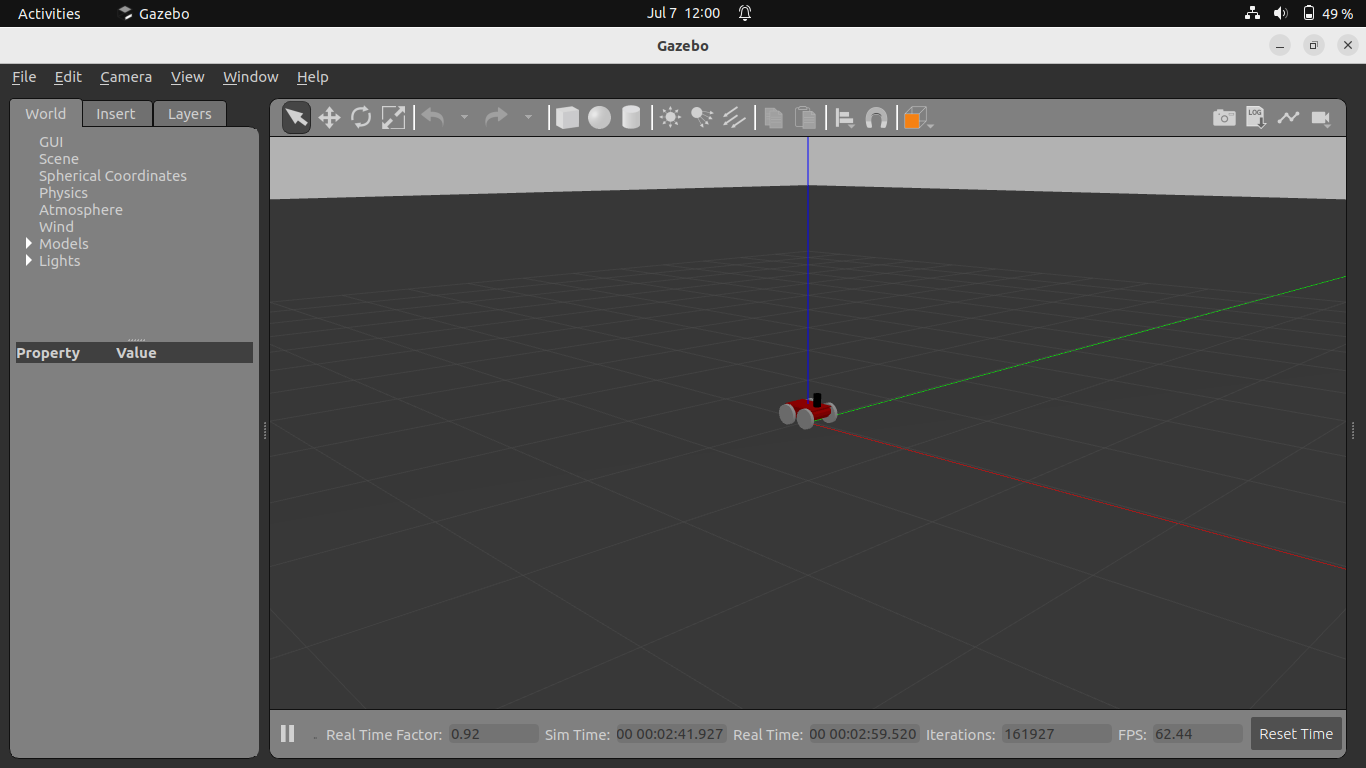
Official documentation: gazebosim.org/docs
4.2 RQt
RQt is a modular graphical application based on Qt, designed for ROS/ROS2. It allows aggregating numerous monitoring, visualization, and configuration tools as plugins: node graph, topics, logs, dynamic parameters, etc. RQt facilitates diagnosis, debugging, and analysis of the TekBot robotic system.
Why use RQt? RQt centralizes all ROS2 supervision and debugging tools in a single graphical interface: you save time, visualize the system state in real-time, and can quickly diagnose communication or configuration problems.
Quick installation: sudo apt install ros-humble-rqt This command installs RQt as well as the majority of essential plugins for supervising, visualizing, and diagnosing a ROS2 system.
Launch: rqt (to launch in a terminal after starting the robot and labyrinth) or ros2 launch maze_solving tekbot_maze.launch.py (this command launches the robot, labyrinth, and automatically opens RQt for graphical monitoring).
Tip: Overlay or organize plugin windows according to your needs: RQt allows a totally customizable interface.
FAQ / Common Issues
RQt does not detect topics or nodes: check that you have properly sourced the ROS2 environment and workspace in this terminal. | Empty interface at launch: add necessary plugins via the Plugins menu. | Display or slowness issues: close heavy applications, reduce window size, or restart RQt. | RQt does not start: check Qt installation and graphical dependencies (sudo apt install qtbase5-dev).
Recommended Plugins for ROS2 Debugging
| Plugin | Use | Menu Access |
|---|---|---|
| Node Graph | Visualizes node structure and their connections | Plugins → Introspection → Node Graph |
| Topic Monitor | Displays active topics list, their frequency, and message structure | Plugins → Topics → Topic Monitor |
| TF Tree | Visualizes the transforms tree (TF) in real-time | Plugins → Visualization → TF Tree |
Official documentation: wiki.ros.org/rqt
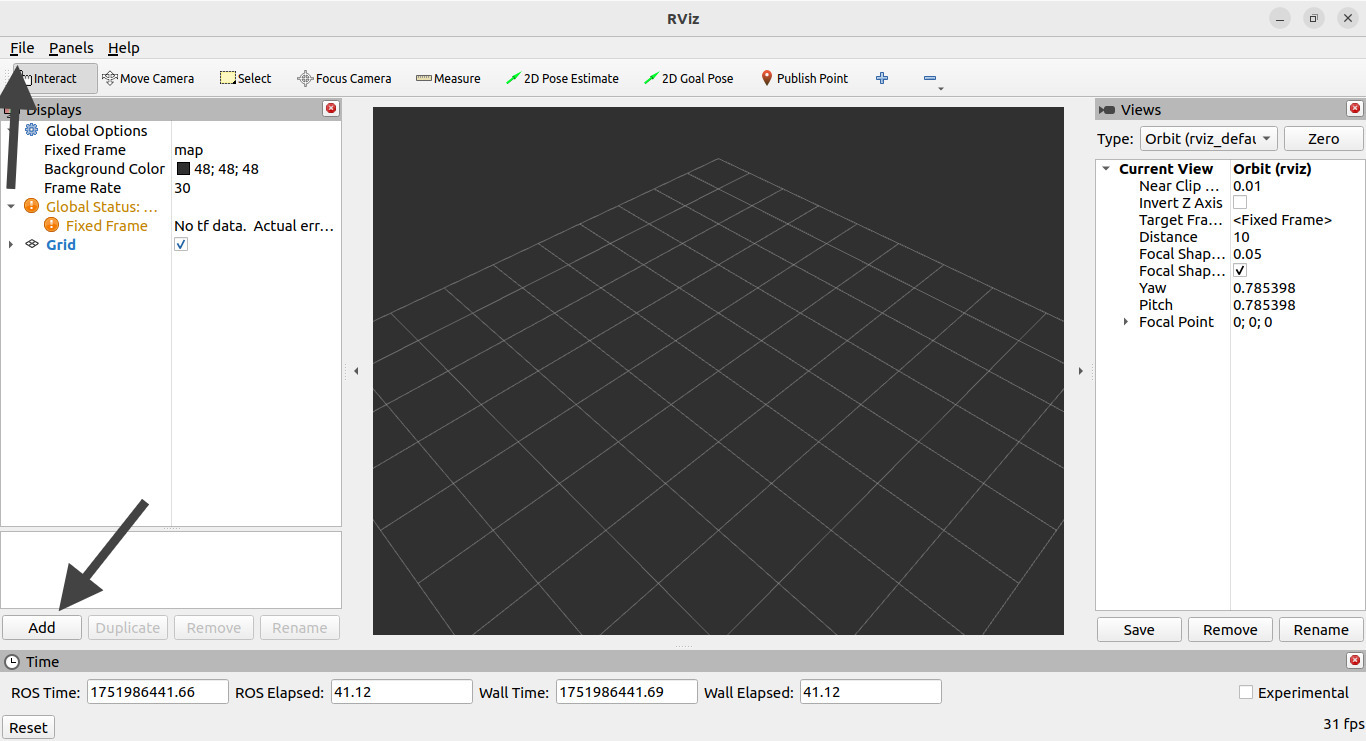
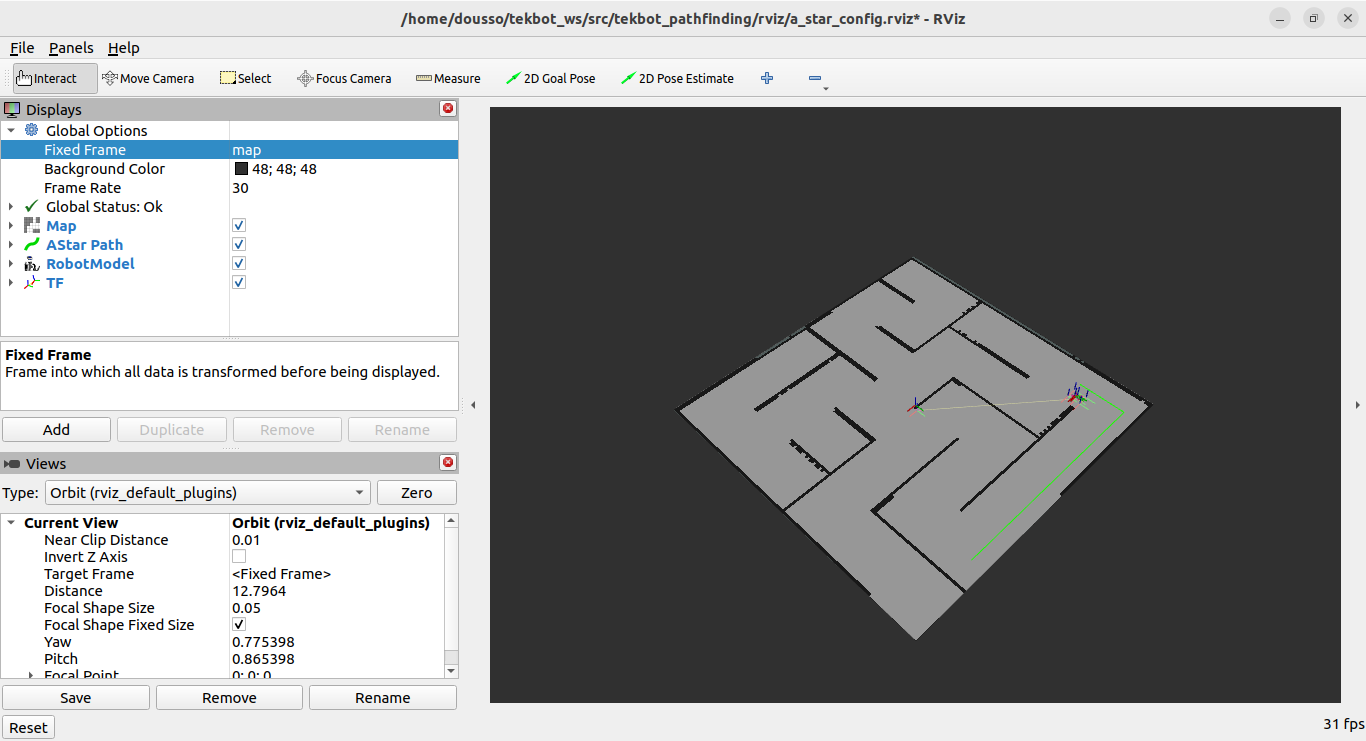
4.3 RViz2
RViz2 is the indispensable 3D visualization tool of ROS2. It allows displaying in real-time the robot state, sensor data (LiDAR, cameras...), generated map, trajectories, coordinate frames, etc. RViz2 is essential for debugging, validation, and interaction with the TekBot system.
Main Displays Table
| Display | Use | Add |
|---|---|---|
| Map | Displays generated map (SLAM, navigation) | Displays → Map |
| LaserScan | Visualizes LiDAR data | Displays → LaserScan |
| TF | Displays frames tree (references) | Displays → TF |
| Path | Displays planned trajectory | Displays → Path |
| Image | Displays camera feed | Displays → Image |
| RobotModel | Displays 3D robot model | Displays → RobotModel |
Step-by-step Procedure
- Launch RViz2 in a terminal:
rviz2 - Add a display via the Add button (bottom left), then choose the type (ex: Map, LaserScan...)
- Customize display parameters in the side panel
- Save your configuration: File → Save Config As…
- To reload a configuration: File → Open Config
Best Practices & Advanced Tips
- Save a different configuration for each scenario (SLAM, navigation, debug...)
- Use keyboard shortcuts to navigate in 3D view (Shift + click, scroll wheel...)
- Close unnecessary displays to improve performance
- Customize colors and display styles according to your needs
- Use interaction tools (2D Pose Estimate, 2D Nav Goal...)
Installation: sudo apt install ros-humble-rviz2Installs RViz2 on Ubuntu/ROS2 Humble.
Quick Launch: rviz2Launches RViz2 after starting simulation or ROS2 nodes.
Common Issues
- RViz2 crashes at launch: update your graphics drivers, try
rviz2 --opengl. - Robot does not appear: check RobotModel display and associated topics.
- Axes or references are offset: check TF (transforms) configuration and ROS2 clock synchronization.
- Cannot add display: ensure the correct message type is published on the topic (ex: "LaserScan", "Image", "PointCloud2").
Official documentation: index.ros.org/p/rviz2/
5. Tele-operation
Tele-operation is a key step in the robotic development cycle: it allows taking manual control of the TekBot robot to validate each subsystem (motors, sensors, ROS2 communication, safety) before any autonomous experimentation.
Why tele-operate?
- Initial verification: Ensure the robot responds well to commands, motors turn in the right direction, sensors publish coherent data.
- Diagnosis and debugging: Quickly identify configuration problems (topics, permissions, drivers, etc.) by observing real-time robot response.
- Calibration: Adjust parameters (speeds, sensitivity, limits) in real or simulated situation.
- Emergency takeover: Intervene manually in case of bug, danger, or critical test.
- Training and demonstration: Allow a novice user to pilot the robot to understand its operation.
Technical Principle
Tele-operation consists of publishing geometry_msgs/Twist messages on the robot's /cmd_vel topic. These messages are interpreted by the movement controller (diff_drive, ackermann, etc.) to generate displacements.
Tele-operation Modes Comparison
| Mode | Advantages | Limits | Use Cases | Installation Command |
|---|---|---|---|---|
| Keyboard | Simple, fast, no additional hardware | Less precise control, no analog | Debug, unit tests, quick familiarization | sudo apt install ros-humble-teleop-twist-keyboard |
| Gamepad | Precise analog control, ergonomic | Sometimes requires configuration, hardware-dependent | Fine driving, training, demonstration | sudo apt install ros-humble-teleop-twist-joy |
| Graphical Interface (RQt) | Accessible to all, visual, intuitive sliders | Less responsive, requires graphical environment | Demonstration, pedagogy, familiarization by beginner | sudo apt install ros-humble-rqt-robot-steering |
| Web / Mobile | Remote control, multiplatform | ROSBridge installation, network security to manage | Remote control, public demo, mobile access | sudo apt install ros-humble-rosbridge-server |
 Software Chain: PC/Gamepad/Web → ROS2 → /cmd_vel → Robot
Advanced Web Tele-operation (WebSocket & Browser)
Install rosbridge_server:
cd ~/tekbot_ws/src && git clone https://github.com/RobotWebTools/rosbridge_suite.gitResolve dependencies:
sudo apt install ros-humble-ament-cmake-mypy(or clone
ament_cmakeif needed)Recompile workspace:
cd ~/tekbot_ws && colcon build && source install/setup.bashLaunch WebSocket server:
ros2 launch rosbridge_server rosbridge_websocket_launch.xml(Server listens on
ws://localhost:9090)Create web tele-operation interface:
git clone https://github.com/RobotWebTools/roslibjs.gitDirect access to modern TekBot tele-operation interface: (Interface to be developed - see ROS2 documentation for examples)
Launch local web server:
python3 -m http.server 8000then open
http://localhost:8000/teleop.html
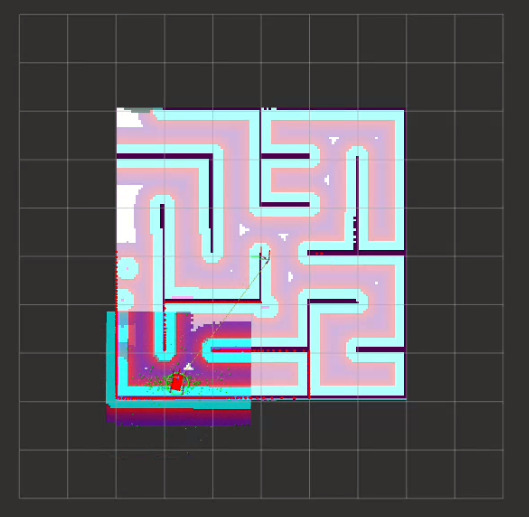
6. SLAM (Mapping)
SLAM (Simultaneous Localization and Mapping) is a fundamental technique in mobile robotics that allows a robot to explore an unknown environment while simultaneously building a map of that environment and locating itself on that map.
Why SLAM?
- Autonomous exploration: The robot can discover and map unknown spaces without human intervention.
- Navigation foundation: The generated map serves as the basis for trajectory planning and autonomous navigation.
- Precise localization: The robot always knows where it is on the map it builds.
Technical Principle: SLAM solves the "closed loop" problem: when the robot returns to a previously visited place, it must recognize that place and correct accumulated errors in the map and localization.
SLAM Toolbox in ROS2: SLAM Toolbox is the reference implementation for ROS2 Humble. It uses the Karto algorithm to create 2D maps from LiDAR data.
Installation:
sudo apt install ros-humble-slam-toolboxLaunch:
ros2 launch slam_toolbox online_async_launch.pyOperation:
- The robot explores the environment by moving
- LiDAR scans the environment and publishes on
/scan - SLAM Toolbox processes data and publishes the map on
/map - The map refines as exploration progresses
Map Saving:
ros2 run nav2_map_server map_saver_cli -f ~/map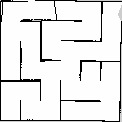
Official documentation: github.com/SteveMacenski/slam_toolbox
7. Nav2 (Navigation)
Nav2 is the ROS2 navigation stack, enabling autonomous navigation of mobile robots. It integrates all necessary components: localization, global planning, local planning, and control.
Main Components:
- AMCL (Adaptive Monte Carlo Localization): Robot localization on a known map
- Global Planner: Long-term trajectory planning (uses A*)
- Local Planner: Real-time obstacle avoidance
- Controller: Precise robot movement control
Installation:
sudo apt install ros-humble-navigation2
sudo apt install ros-humble-nav2-bringup
Launch:
ros2 launch nav2_bringup navigation_launch.pyConfiguration: Nav2 uses YAML files for configuration:
nav2_params.yaml: general parametersbt_navigator.yaml: behavior treecostmaps: costmap configuration
Complete Workflow:
- Load a pre-recorded map or use SLAM
- Initialize AMCL for localization
- Define a goal in RViz2
- Nav2 plans and executes the trajectory
Official documentation: navigation.ros.org
8. A* Algorithm
The A algorithm* is the most used pathfinding algorithm in mobile robotics. It finds the optimal path between a starting point and an ending point while avoiding obstacles.
Principle: A* uses a heuristic function to guide the search towards the optimal solution. The function f(n) = g(n) + h(n) where:
- g(n): real cost to reach node n from start
- h(n): heuristic estimate of cost to go from n to goal
- f(n): total estimate of cost of path passing through n
Advantages:
- Always finds the optimal path if heuristic is admissible
- More efficient than Dijkstra thanks to heuristic
- Easily extensible and configurable
Use in ROS2: A* is used by Nav2's global planner. It can be configured via planner parameters.
TekBot Tip
In ROS2, A* is used by Nav2's global planner to generate safe and efficient trajectories, taking into account the occupancy map generated by SLAM or provided by the user.
Step-by-step Operation
- Initialize open list with starting point.
- Repeat until target is reached or exhaustion:
- Select node with smallest f(n).
- If it's the target, reconstruct path.
- Otherwise, move this node to closed list.
- For each accessible neighbor:
- Calculate g(n), h(n), f(n).
- If better path found, update and add to open list.
Limits and Improvements:
| Limits | Possible Improvements |
|---|---|
| Slow on large maps or with many obstacles | Use variants (Theta*, Jump Point Search), optimize heuristic |
| Does not handle dynamic environments (moving obstacles) | Combine with D* Lite, or reactive algorithms |
| Paths sometimes unnatural (right angles) | Post-processing (smoothing, Bézier curves) |
To go further:
- Official Nav2 Documentation - Global Planner
- Wikipedia: A* Algorithm
- A* in Robotics (scientific article, English)
9. Challenges & Solutions
Note
The challenges and solutions presented here are those we actually encountered during the TekBot project development. For each challenge, a concrete solution was provided and explained in the previous sections (SLAM, Nav2, A*, FAQ, etc.). You can refer to them to find our experience feedback and the methods that allowed solving each difficulty.
Incomplete mapping: Check robot coverage, adjust speed and exploration strategy.
Unstable localization: Properly initialize AMCL, avoid launching SLAM and AMCL at the same time.
Blocked navigation: Monitor costmaps, adjust planner and controller parameters.
Performance issues: Limit RViz2 displays, close heavy applications, optimize PC configuration.
Map saving: Difficulties saving the map generated by SLAM, requiring checking permissions and file format.
Path planning (A):* The algorithm sometimes planned the path from the reference origin instead of the robot's actual position; it was necessary to correct localization consideration in the code.
Various practical cases: Synchronization problems between ROS2 nodes, topic configuration errors, and parameter adjustments to achieve optimal behavior.
Best Practices
- Document each step and each technical choice.
- Regularly test each component (SLAM, Nav2, A*...)
- Collaborate and seek help on ROS2 forums.
FAQ
- Robot spinning in circles? Check sensor calibration and controller configuration.
- Map not saving? Check write permissions and folder path.
10. Appendices & References
- ROS2 Documentation: docs.ros.org/en/humble
- SLAM Toolbox: github.com/SteveMacenski/slam_toolbox
- Nav2: navigation.ros.org
- Gazebo Classic: classic.gazebosim.org
- RQt: wiki.ros.org/rqt
- RViz2: index.ros.org/p/rviz2/
- ROS2 Forum: answers.ros.org
- Map Examples: tekbot_sim/maps
For any questions or suggestions, consult the official documentation or contact the pedagogical team.
11. Conclusion
This TekBot project allowed concretely exploring the main tools and methods of mobile robotics under ROS2: simulation in Gazebo, SLAM, autonomous navigation, trajectory planning (A*), and tele-operation. The encountered challenges were overcome thanks to an experimental and collaborative approach, with each solution explained in the documentation. This work constitutes a solid foundation to go further: algorithm optimization, new sensor integration, or deployment on real robot. Do not hesitate to draw inspiration from this experience for your own projects!